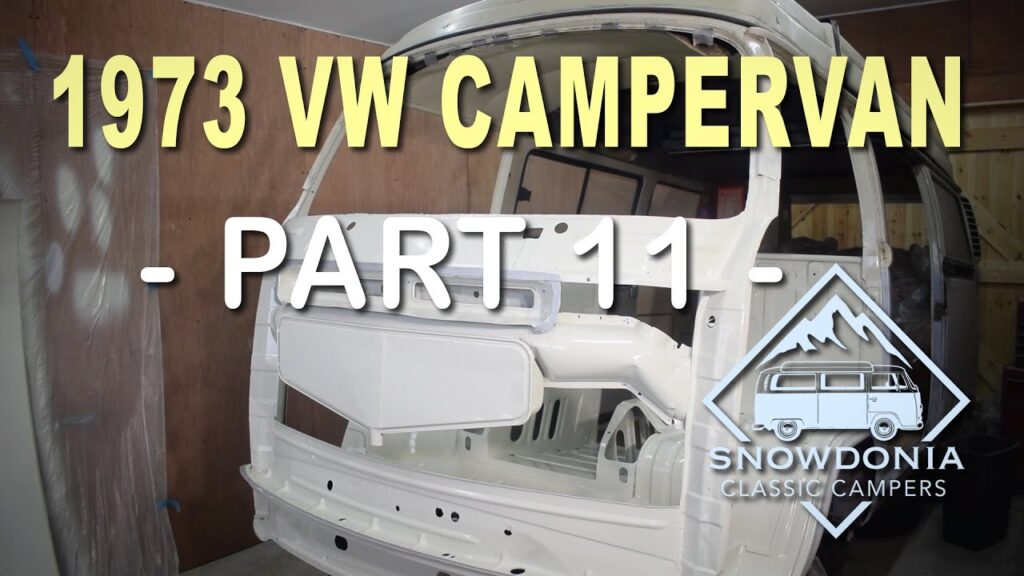
In the 11th installment of the 1973 VW Campervan Restoration series, Snowdonia Classic Campers takes you through the process of preparing Nell, their 1973 VW Bay window campervan, for the upcoming hire season. In this episode, the focus is on painting the cab area. With the help of poly disks and wire brushes, the team begins by welding up holes in the seat base and treating areas with rust. After applying epoxy primer and seam sealer, they proceed to coat the entire cab area with gray high-build primer. Finally, using a 2-pack plate paint, they carefully apply three coats of 2-pack Tuscan white for a flawless finish. Stay tuned for the next episode where they will put on the front panel and complete the restoration process.
The 11th part of the 1973 VW Campervan Restoration series, presented by Snowdonia Classic Campers, focuses on the preparation of Nell, their 1973 VW Bay window campervan, for the upcoming 2020 hire season. The episode covers the painting of the cab area, including steps such as welding up holes in the seat base, treating rust, applying epoxy primer and seam sealer, and coating the entire cab with gray high-build primer. The team concludes by applying three coats of 2-pack Tuscan white paint to give Nell a fresh and polished appearance. Don’t miss the next episode where they will complete the restoration process by assembling the front panel.
Check out these awesome Van Life Guides!
Prepping the Cab Area
When preparing the cab area for painting, one crucial step is to weld up any holes in the seat base. These holes can develop over time due to wear and tear or rust. By welding them up, you ensure that the seat base is sturdy and free from any potential weak spots that could compromise the integrity of the cab.
Another important aspect of prepping the cab area is cleaning and treating rusty areas. Rust can be a common issue in older vehicles, and it’s essential to address it before applying any paint. To clean rusty areas, you can use a wire brush or sandpaper to remove the rust particles. Once the surface is clean, you can apply a rust treatment solution to prevent further corrosion.
To ensure that you only paint the intended areas of the bus, it is necessary to mask off the rest of the bus. This step involves using masking tape and plastic sheeting to cover any areas that should not come into contact with the paint. By meticulously masking off the rest of the bus, you prevent overspray or accidental paint drips on areas such as windows, tires, or other components that should remain unpainted.
Applying Epoxy Primer
Before applying any paint, it is crucial to apply an epoxy primer. The epoxy primer creates a strong bond between the surface and the subsequent layers of paint, ensuring a smooth and professional finish.
To mix up the epoxy primer, follow the manufacturer’s instructions. Typically, you will need to combine the epoxy primer with a hardener in a certain ratio. Thoroughly mix the two components until they are completely blended and ready for application.
Before applying the epoxy primer, it is essential to prepare the surface properly. This involves cleaning the surface, removing any dust or debris, and sanding it to create a rough texture that promotes better adhesion. Once the surface is clean and prepared, you can start applying the epoxy primer. Use a paint gun or a roller brush, depending on the desired finish, and apply the primer in even, overlapping strokes.
Seam Sealing
Seam sealing is an important step that ensures the interior of the cab is well-protected from moisture and potential leaks. It involves applying a seam sealer along the seams, joints, and connections of various components within the cab.
To apply the seam sealer, start by removing any existing sealer that may have deteriorated over time. Clean the area thoroughly to remove any dust or debris. Then, using a specialized sealer gun or a caulk gun, carefully apply the seam sealer along the identified areas. Make sure to smooth it out for an even and consistent application. Allow the seam sealer to dry completely before moving on to the next step.

If You Love Van Life, You Will Not Want To Miss These, Click Here to Read More Awesome!
Undercoating
To protect the wheel arches and the cap floor from the elements and potential damage, applying undercoat is essential. Undercoating acts as a barrier, preventing corrosion and providing added durability to these areas.
Before applying the undercoat, ensure that the surfaces are clean and free from any debris or rust. You can use a wire brush or sandpaper to prepare the surface. Once clean, spray the undercoat evenly on the wheel arches and the cap floor, making sure to cover all the exposed areas. Apply multiple coats if necessary, allowing each coat to dry before applying the next.
Surface Imperfections
To achieve a flawless finish on the body of the bus, it is essential to address any surface imperfections. Surface imperfections can include small dents, scratches, or uneven surfaces that need to be smoothed out before painting.
One way to touch up these imperfections is by using a product called Dolphin Glaze. Dolphin Glaze is a filler that can be applied to smaller imperfections and sanded down to create a smooth surface. Apply the Dolphin Glaze using a putty knife or a plastic spreader, making sure to fill in the imperfections completely. Once the filler is dry, carefully sand it down using fine-grit sandpaper until the surface is level and smooth.
High-build Primer
To further refine the surface and create a smooth base for the paint, applying a high-build primer is necessary. The high-build primer helps to fill in any remaining imperfections and creates a thicker layer that can be sanded down for a flawless finish.
To apply the gray high-build primer, ensure that the surfaces are clean and free from any debris. Using a paint gun, apply the primer in even layers, making sure to cover all exposed areas. Let each coat dry before applying the next, and continue layering until you achieve the desired level of coverage. Once the high-build primer is dry, it can be sanded down lightly to create an even and smooth surface.
Second Coat Primer Filler
After applying the first coat of primer filler inside the cab area, it is essential to mix and apply a second coat. The second coat helps to further fill in any remaining imperfections and ensures a solid foundation for the final paint job.
Mix the second coat of primer filler according to the manufacturer’s instructions. Once mixed, apply it evenly inside the cab area, making sure to cover all exposed surfaces. Allow the second coat to dry completely before moving on to the next step.
Preparing Front Panel and Bus for Top Coat
To ensure a clean and professional finish, it is necessary to properly prepare the front panel and the rest of the bus for the top coat. This involves cleaning, sanding, and masking off areas that have already been painted to avoid overspray or accidental damage.
Start by cleaning the surface of the front panel and the bus, removing any dust, debris, or previously applied products. Once clean, sand the surface lightly to create a smooth base for the top coat. Next, carefully mask off areas that have already been painted using masking tape and plastic sheeting. This will protect those areas from being painted over during the top coat application process.
Mixing and Applying Top Coat
Mixing and applying the top coat paint is the final step in the preparation process before painting. The top coat color should be chosen carefully, following any specific guidelines or preferences.
To mix the top coat paint, follow the manufacturer’s instructions, which typically include combining the paint with a hardener or activator in specific ratios. Thoroughly mix the two components until they are well-blended and ready for application.
Before applying the top coat, prepare the spray gun by cleaning it thoroughly and adjusting the nozzle to achieve the desired spray pattern and flow. Once the gun is ready, carefully mask off areas that should not come into contact with the top coat. Apply the top coat in even, overlapping strokes, making sure to achieve full coverage.
Conclusion
In conclusion, prepping the cab area for paint involves several steps to ensure a professional and durable finish. From welding up holes in the seat base and treating rusty areas to applying undercoat and top coat, each step is essential for achieving a flawless result. By following proper techniques and using high-quality products, you can transform the cab area of a bus into a visually appealing and long-lasting surface. Remember to prioritize surface preparation, use the appropriate primers and fillers, and carefully mask off any areas that should remain unpainted. With diligence and attention to detail, your bus can undergo a successful painting process and regain its aesthetic appeal.

