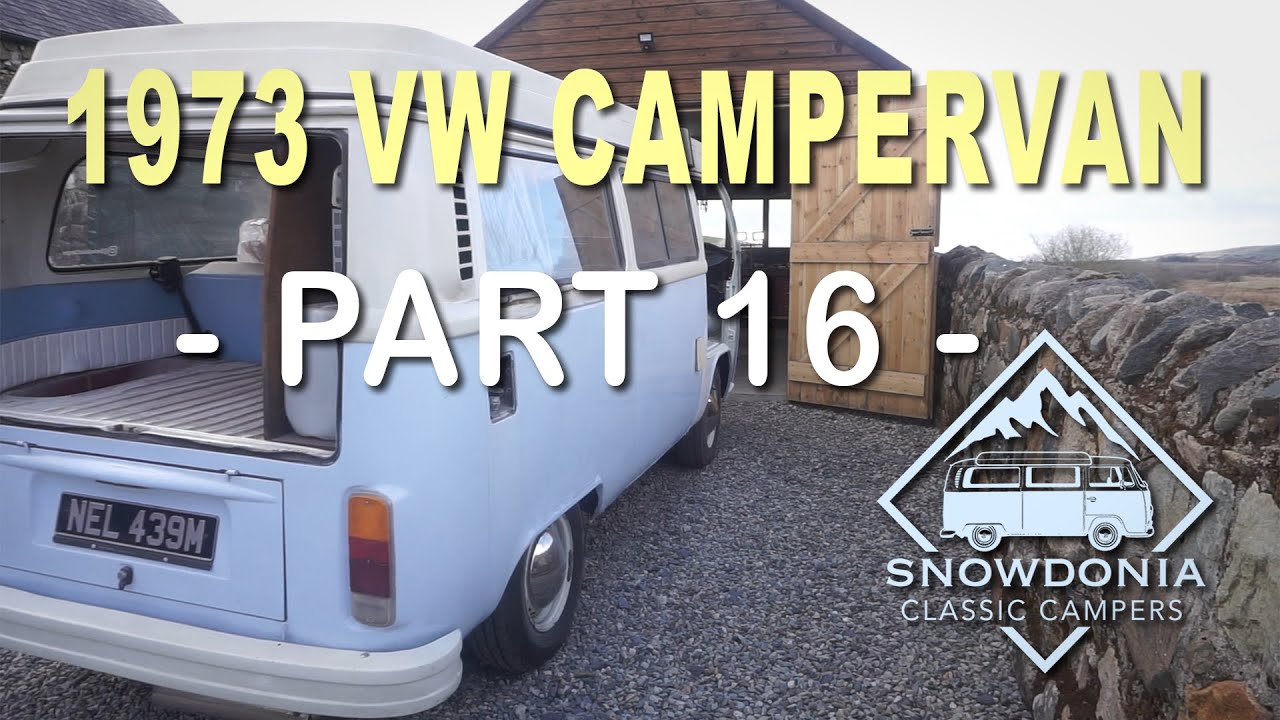
In “1973 VW Campervan Restoration Part 16: Getting Nell Back on Its Wheels,” Snowdonia Classic Campers takes viewers on the journey of preparing their 1973 VW Bay window campervan, Nell, for the upcoming 2020 hire season. This video installment focuses on getting Nell back on four wheels and back in motion. The restoration process includes tasks such as refitting indicator and wiper stalks, wiring up the ignition, reinstalling the gear lever, and installing the oil pressure and temperature gauges. By the end of the video, Nell is ready to hit the road again, paving the way for future episodes where the side door and rear hatch will be tackled.
Throughout the video, Snowdonia Classic Campers showcases their expertise in restoring vintage vehicles, offering valuable insights and tips for fellow enthusiasts. The attention to detail, commitment to quality, and use of innovative aftermarket accessories, like the NP gear lever, demonstrates their dedication to providing a seamless experience for campervan rental customers. Stay tuned for the next installment to witness the transformation of Nell’s side door and rear hatch, as Snowdonia Classic Campers continues to bring this vintage beauty back to life.
Check out these awesome Van Life Guides!
1973 VW Campervan Restoration Part 16: Getting Nell Back on Its Wheels
Refitting Indicator and Wiper Stalks
In the 16th installment of the 1973 VW Campervan restoration series, we will focus on getting Nell back on its wheels. One crucial step in this process is refitting the indicator and wiper stalks. These stalks control essential functions of the vehicle, such as indicating turns and activating the wipers. Ensuring that they are properly installed is vital for both safety and functionality.
To refit the indicator and wiper stalks, start by removing the old ones if they are still attached. Clean the area thoroughly to remove any dirt or debris that may have accumulated over time. Carefully inspect the wiring and connections to ensure they are in good condition. Replace any damaged or worn-out components as necessary.
Next, take the new indicator and wiper stalks and align them with the corresponding slots on the steering column. Gently slide them into place, ensuring they fit securely. Once in position, connect the wiring harnesses to their respective terminals. Pay close attention to the color coding and ensure each wire is connected correctly.
After connecting the wiring, test the functionality of the indicator and wiper stalks. Turn on the ignition, activate the indicators, and ensure they are flashing at the appropriate speed. Similarly, test the wipers to ensure they operate smoothly and effectively. If any issues are detected, double-check the wiring connections and troubleshoot accordingly.
Wiring up the Ignition
One of the vital steps in getting Nell back on its wheels is wiring up the ignition. Without a properly connected ignition system, starting the vehicle would be impossible. This process requires attention to detail and following the manufacturer’s guidelines precisely.
Begin by locating the ignition switch and ignition coil in the engine compartment. Familiarize yourself with these components to ensure correct wiring. Refer to the wiring diagram specific to your campervan model for guidance.
Using the appropriate gauge of wire, connect the positive terminal of the ignition coil to the ignition switch. Ensure all connections are secure and free from any loose or exposed wires. It is crucial to follow the recommended wire routing as specified in the wiring diagram.
Next, connect the ignition switch to the battery’s positive terminal. Again, verify the appropriate wire gauge and ensure a secure connection. Take caution to avoid any accidental short circuits during the process.
Once all connections are made, test the ignition system by turning the key in the ignition switch. Listen for the familiar sound of the engine cranking. If the engine does not start or if there are any issues, double-check the wiring connections and troubleshoot accordingly.
Starting the Vehicle
With the indicator and wiper stalks refitted, and the ignition system properly wired up, it’s time to start the vehicle. After the long and meticulous restoration process, this is a significant moment for any campervan enthusiast.
Before attempting to start the engine, perform a final inspection of all wiring connections and ensure that everything is correctly installed. Check the fuel tank to ensure it is adequately filled and verify that there are no fuel leaks.
Insert the key into the ignition switch and turn it to the starting position. Listen carefully for the sound of the engine turning over. If the engine starts successfully, allow it to run for a few minutes to ensure proper operation. Pay attention to any unusual sounds or warning lights on the instrument panel.
If the engine fails to start, double-check all wiring connections and troubleshoot any potential issues. It may be necessary to consult a professional mechanic or seek assistance from experienced individuals in the campervan restoration community.
Reinstalling the Gear Lever
Once Nell is up and running, it’s time to reinstall the gear lever. The gear lever is a crucial component in controlling the transmission and shifting between gears. Proper installation is necessary to ensure smooth and precise gear changes, enhancing the overall driving experience.
Start by removing the gear lever surround and boot if they are still in place. This will provide easier access to the gear lever assembly and mounting points. Clean the area and inspect the assembly for any signs of wear or damage. Replace any worn-out components as needed.
Align the gear lever with the mounting points on the transmission. Carefully slide it into place, ensuring it engages securely. Some models may require additional adjustments or alignment procedures. Refer to the campervan’s service manual or consult with experienced professionals for specific instructions.
Before completing the installation, test the gear lever’s functionality. Shift through each gear, ensuring smooth and effortless transitions. Pay attention to any grinding or resistance, which may indicate misalignment or other issues.
Issues with Aftermarket Gear Lever
During the restoration process, it is not uncommon to encounter issues with aftermarket parts. In the case of the gear lever, some enthusiasts have reported difficulties with fitment and compatibility. These issues can range from misalignment to interference with other components.
If you encounter problems with an aftermarket gear lever, take the time to thoroughly assess the situation. Identify any specific compatibility issues and determine whether modifications or adjustments are needed.
One potential solution is to create a solid steel spacer. This spacer can be used to adjust the height or position of the gear lever, compensating for any fitment issues. Take precise measurements and select an appropriate material to ensure durability and reliability.
Creating a Solid Steel Spacer
To create a solid steel spacer for the gear lever, start by selecting a suitable steel material. Consider using stainless steel or another corrosion-resistant metal to ensure longevity. Use precise measurement tools to determine the required dimensions for the spacer.
Mark the steel material according to the measurements obtained. Ensure precise lines and use a cutting tool designed for metal to create clean and accurate cuts. Take caution to maintain safety during this process by wearing appropriate protective gear.
After cutting the spacer material to the desired size, smooth any rough edges or burrs using a file or sandpaper. This will prevent any potential damage to other components during installation. Clean the spacer thoroughly to remove any debris, ensuring a clean and precise fit.
Installing the Spacer for the Gear Lever
With the custom steel spacer prepared, it’s time to install it in the campervan. Begin by removing the gear lever assembly if necessary. Place the spacer in the desired position to compensate for any fitment issues encountered with the aftermarket gear lever.
Ensure that the spacer aligns perfectly with the mounting points on the transmission and the gear lever assembly. The spacer should fit securely and not interfere with the movement of the gear lever.
Once the spacer is in position, reassemble the gear lever assembly according to the manufacturer’s instructions. Test the gear lever’s functionality and ensure smooth and precise gear changes. If any issues persist, further adjustments or modifications may be necessary.
Installing Oil Pressure and Temperature Gauges
Installing oil pressure and temperature gauges is a crucial step in monitoring the health and performance of the engine. These gauges provide valuable insights into the engine’s condition, allowing for early detection of potential issues.
To install oil pressure and temperature gauges, begin by selecting suitable locations for mounting. Ideal locations include the dashboard or A-pillar, ensuring easy visibility while driving.
Use appropriate tools to create a mounting hole for each gauge. Pay close attention to the size and shape of the hole, ensuring a snug fit. Mount the gauges securely using provided brackets or mounting hardware.
Next, connect the gauges to the corresponding sensors. Refer to the manufacturer’s instructions for specific wiring diagrams and connection points. Take care to ensure accurate connections, as improper wiring can lead to inaccurate readings or damage to the gauges.
After connecting the gauges, test their functionality by starting the engine. Monitor the readings and verify that they fall within the acceptable range. If any discrepancies are observed, double-check the wiring connections and troubleshoot as needed.
Getting the Front Wheels Back Home
With Nell up and running and various interior components intact, it’s time to get the front wheels back home. After being on jack stands for an extended period, it is essential to ensure proper alignment and suspension functionality.
Begin by removing the jack stands, carefully lowering the campervan to the ground. Pay close attention to any signs of suspension damage or misalignment during this process. If any issues are detected, consult with a professional mechanic for further evaluation.
Once the campervan is on the ground, check the tires for proper inflation and signs of wear. Adjust the tire pressure as needed, adhering to the manufacturer’s recommendations. Inspect the tire treads and sidewalls for any damage or signs of aging. Replace any worn-out tires to ensure optimal safety and performance.
Next, perform a visual inspection of the front wheels and suspension components. Look for any signs of misalignment, loose bolts, or worn-out parts. Address any issues discovered during the inspection, either by making the necessary adjustments or replacing damaged components.
Lowering the Campervan to the Ground
The final step in getting Nell back on its wheels is lowering the campervan to the ground completely. This brings the restoration journey to a satisfying conclusion, marking the transition from a project in progress to a fully functional and road-worthy campervan.
With all preparations made, slowly release the hydraulic jack or lower the vehicle using the lifting equipment. Ensure that the campervan maintains stability throughout the process, minimizing any sudden movements or shifts. Exercise caution and keep clear of any areas where the vehicle could potentially move or tip.
As the campervan touches the ground, visually inspect the overall posture and alignment. Observe whether the weight distribution appears balanced and if the suspension settles evenly. Address any issues promptly, consulting with professionals if necessary.
Congratulations! Your 1973 VW Campervan, Nell, is officially back on its wheels, ready to embark on new adventures. Take a moment to appreciate the dedication and craftsmanship that brought this restoration project to fruition.

If You Love Van Life, You Will Not Want To Miss These, Click Here to Read More Awesome!
Conclusion
In this 16th installment of the 1973 VW Campervan restoration series, we focused on the process of getting Nell back on its wheels. We discussed the significance of refitting the indicator and wiper stalks, wiring up the ignition, starting the vehicle, reinstalling the gear lever, addressing aftermarket gear lever issues, creating a solid steel spacer, installing oil pressure and temperature gauges, getting the front wheels back home, and lowering the campervan to the ground.
Each step in this process required attention to detail and adherence to proper techniques. By following the outlined procedures, you can ensure the safe and successful reintegration of vital components into your campervan. The careful installation and testing of these components will contribute to an enjoyable and reliable driving experience.
As your restoration journey reaches its conclusion, take pride in the transformation of your 1973 VW Campervan. The dedication and hard work invested in this restoration will undoubtedly be rewarded as you hit the open road, creating lasting memories in your newly revived campervan.

