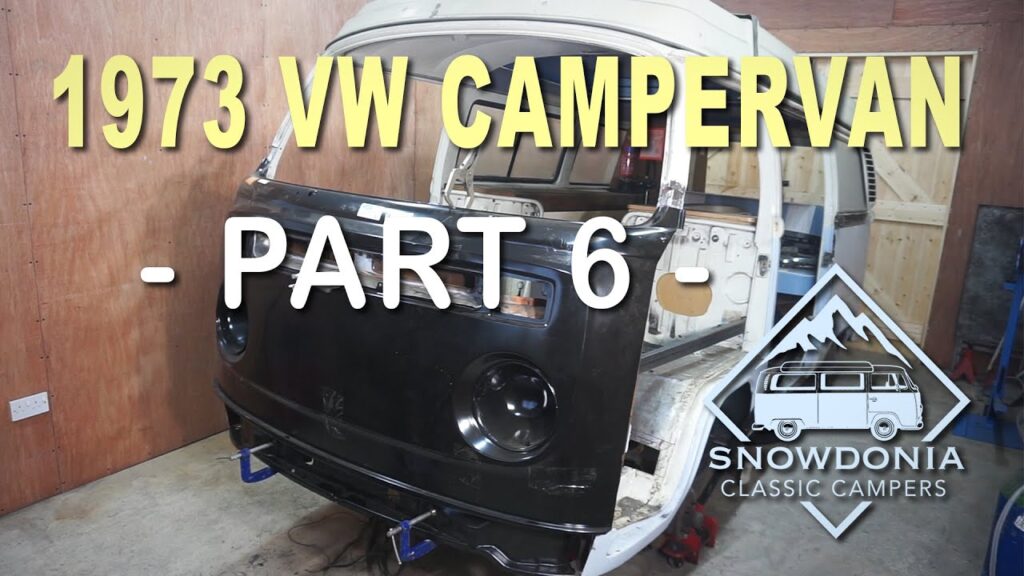
In the sixth installment of the 1973 VW Campervan Restoration series, Snowdonia Classic Campers shares their progress on preparing Nell, their 1973 VW Bay window campervan, for the upcoming 2020 hire season. The focus of this episode is the welding and trial fitting of the new front panels. By meticulously mocking up all the panels on the front to ensure a proper fit before beginning any welding work, the team demonstrates their commitment to precision. The episode also highlights the importance of measuring and adjusting the front panel to accommodate the windscreen and ensure a seamless fit. The video serves as a valuable resource for campervan enthusiasts seeking guidance on panel restoration and fitting.

Check out these awesome Van Life Guides!
Mocking up the Front Panels
The first step in fitting the front panels is to create a mock-up of the desired design. This involves using cardboard or other materials to create a template for the front panels. By doing this, you can ensure that the panels will fit properly and align with other components of the vehicle. Mocking up the front panels is an essential step in the process as it allows you to make any necessary adjustments before moving forward.
Fitting the Bottom Panel
Once the front panel mock-up is complete, the next step is to fit the bottom panel. This panel serves as the foundation for the front structure of the vehicle. It is important to ensure that the bottom panel fits snugly and securely in place. This can be achieved by using clamps or other securing methods. Fitting the bottom panel accurately is crucial as it sets the stage for the rest of the panel fitting process.
Measuring and Fitting the Windscreen
After the bottom panel is in place, it is time to measure and fit the windscreen. The windscreen plays a significant role in the overall appearance and functionality of the vehicle. Properly measuring and fitting the windscreen ensures that it fits securely and provides an unobstructed view for the driver. Careful attention should be given to aligning the windscreen with the surrounding panels for a seamless fit.
If You Love Van Life, You Will Not Want To Miss These, Click Here to Read More Awesome!
Fitting the Front Doors
Once the windscreen is in place, it is time to focus on fitting the front doors. This step involves aligning the doors with the surrounding panels and ensuring that they open and close smoothly. Proper fitting of the front doors is important for both aesthetics and functionality. Any adjustments needed to ensure a proper fit should be made before proceeding to the next step.
Welding the Lower Inner Panel
After the front doors are fitted, the lower inner panel can be welded in place. This panel provides structural support and helps to reinforce the front structure of the vehicle. Welding the lower inner panel requires precision and skill to ensure a strong and durable bond. Care should be taken to ensure that the panel is aligned properly and securely attached.
Welding and Repairing the Inner Wheel Arch Tubs
The next step in the process is to weld and repair the inner wheel arch tubs. These tubs provide protection for the wheel wells and help to maintain the structural integrity of the vehicle. Any damage or rust should be addressed during this step to ensure that the tubs are in optimal condition. Welding and repairing the inner wheel arch tubs requires careful attention to detail to ensure a proper fit and strong welds.
Cutting and Repairing the Wheel Arches
After the inner wheel arch tubs are taken care of, it is time to address any issues with the wheel arches themselves. This may involve cutting away damaged or rusted sections and replacing them with new metal. The goal is to repair any damage and create a clean and smooth surface for the wheel arches. Care should be taken to ensure that the wheel arches are properly aligned with the surrounding panels for a seamless appearance.
Preparing the Front Outside Chassis Legs
Once the wheel arches are in good condition, it is time to prepare the front outside chassis legs. These legs provide structural support and stability to the front of the vehicle. They should be thoroughly inspected for any damage or rust and repaired or replaced as necessary. It is crucial to ensure that the front outside chassis legs are securely attached and aligned properly.
Test Fitting and Spot Welding the Chassis Legs
After the front outside chassis legs are prepared, they can be test fitted and spot welded in place. Test fitting involves ensuring that the chassis legs align properly with the surrounding panels and connect securely. Spot welding is a process in which small welds are made at specific points to secure the chassis legs. This step requires careful precision and attention to detail to ensure a strong and stable connection.
Conclusion
Mocking up the front panels, fitting the bottom panel, measuring and fitting the windscreen, fitting the front doors, welding the lower inner panel, welding and repairing the inner wheel arch tubs, cutting and repairing the wheel arches, preparing the front outside chassis legs, and test fitting and spot welding the chassis legs are all important steps in the process of fitting the front panels of a vehicle. Each step requires careful attention to detail, precision, and skill to ensure a proper fit and strong bond. By following these steps, you can achieve a seamless and aesthetically pleasing front panel assembly that not only enhances the appearance of the vehicle but also provides structural support and durability.

