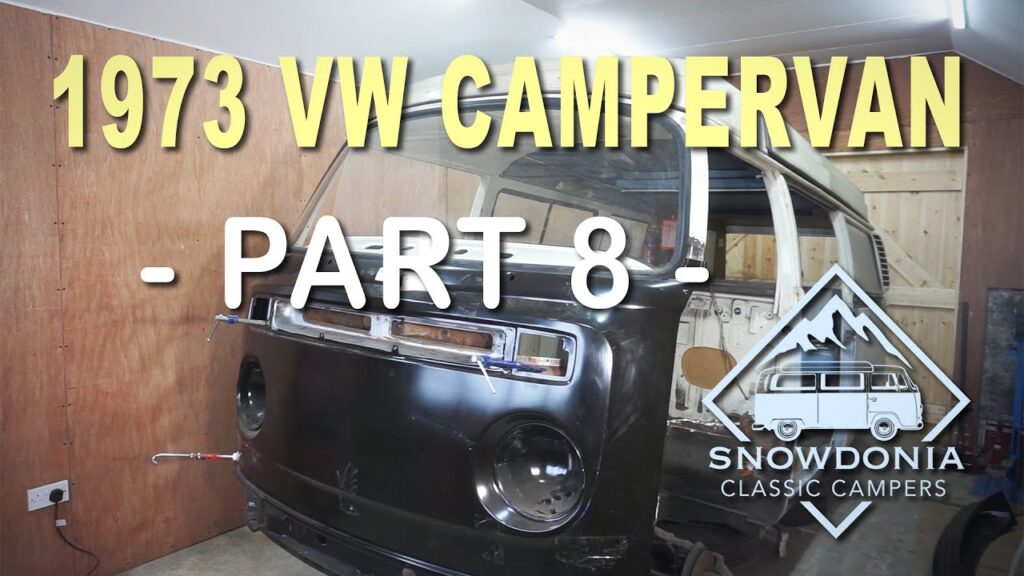
In the eighth installment of the 1973 VW Campervan Restoration series by Snowdonia Classic Campers, the focus shifts to replacing the front panel of the 1973 VW Bay window campervan. The video begins with the removal of the front doors and the creation of a template to address a previous accident-related displacement in the A post. Metal plates are then cut out and replaced, followed by welding along the edges for added strength. The episode concludes with the mocking up of the new panels, the placement of the dashboard to ensure proper alignment, and the preparation for welding the inner windscreen and lower panels. In the next episode, the focus will be on cleaning, priming, and top coating the front area, as well as addressing the absence of tap brackets for the inner windscreen.
Check out these awesome Van Life Guides!
Removing the Front Doors
Removing the front doors of a bus is an essential step in the process of modifying or renovating the vehicle. It allows for easier access to the interior for various tasks such as replacing metal plates, welding, and dashboard installation. To safely remove the front doors, start by securely supporting the doors with blocks or wedges to prevent them from falling while being detached. Remove the door hinges and the securing bolts or screws using the appropriate tools. Once the doors are detached, carefully store them away in a safe area to avoid any damage.
Replacing the Metal Plates
After removing the front doors, it may be necessary to replace the metal plates surrounding the door openings. This could be due to damage, rust, or as part of a customization project. Begin by carefully measuring and removing the original metal plates. Once removed, clean the surrounding area to ensure a smooth and secure fit for the new plates. Take precise measurements of the openings and using those measurements, cut the new metal plates to size. Ensure that the new plates match the thickness and material type of the original plates for consistency and structural integrity. Fit the new plates into place, aligning them accurately, and secure them firmly with appropriate fasteners.
Welding the Edges of the Metal Plates
To enhance the durability and strength of the metal plates, it is recommended to weld the edges of the plates securely. This ensures a robust connection and prevents any unnecessary movement or vibration while the vehicle is in operation. Prior to welding, thoroughly clean the edges of the metal plates to remove any debris or rust that could hinder the welding process. Use a suitable welding technique, such as arc welding or gas welding, depending on the type of metal being used. Ensure that the welding is done meticulously and evenly along the edges, creating a strong bond between the plates. Once the welding is complete, inspect the welds for any defects or irregularities, and address them accordingly.

If You Love Van Life, You Will Not Want To Miss These, Click Here to Read More Awesome!
Mocking Up the Front of the Bus
Mocking up the front of the bus involves temporarily fitting various components to ensure proper alignment and fit before final installation. This step is crucial in achieving a professionally finished look and preventing any issues that could arise from misaligned or poorly fitted parts. Begin by positioning the metal plates, doors, and other front panel components in their designated places. Check for any gaps, misalignments, or interferences that may need adjustment. Make any necessary modifications, such as trimming or bending the metal plates, to achieve a precise fit. Once the mock-up is satisfactory, proceed to the next step of the installation process.
Putting the Dashboard Back In
Putting the dashboard back into the bus requires a systematic approach to ensure proper functioning and aesthetics of the interior. Start by inspecting the dashboard for any signs of damage or wear that may require repair or replacement. Once the dashboard is deemed suitable for installation, carefully position it in the appropriate location, aligning it with the existing mounting points. Reconnect the wiring harnesses and connectors, ensuring correct connections for all electrical components. Double-check that all instruments, controls, and switches are in their correct positions. Once everything is in place, secure the dashboard firmly to the mounting points using the designated bolts or screws.
Making Tabs and Brackets for the Inner Windscreen
Creating tabs and brackets for the inner windscreen is an essential step to properly secure and support the glass for both safety and aesthetic reasons. Start by measuring the dimensions of the inner windscreen and determining the placement of the tabs and brackets. Using the appropriate materials, such as metal strips or brackets, carefully shape and cut them to size. Ensure that the tabs and brackets are sturdy enough to withstand the weight and movement of the windscreen. Position them securely along the edges, using appropriate fasteners or welding for attachment. Take special care to align the tabs and brackets accurately to maintain the stability and integrity of the windscreen.
Drilling Holes for the Dash Bolts
Drilling holes for the dash bolts is necessary to ensure a proper and secure fit of the dashboard. Before drilling, carefully measure and mark the exact locations where the bolts will be inserted. Use a drill bit appropriate for the type of material on the dash and ensure that the holes are drilled precisely and cleanly. Take caution while drilling to avoid damaging any existing components or wiring behind the dashboard. After drilling the holes, clean any debris or shavings that might have accumulated. Insert the dash bolts into the holes and tighten them securely with the appropriate tools, ensuring the dashboard remains stable and firmly attached.
Welding the Bottom Panel
Welding the bottom panel is a crucial step in reinforcing the structural integrity and stability of the bus. Begin by cleaning the area where the bottom panel will be welded, removing any contaminants or debris that could interfere with the welding process. Align the bottom panel correctly, making sure it is flush with the surrounding surfaces. Use the appropriate welding technique, paying close attention to ensure a strong and uniform bond. Be meticulous in your welding technique, taking care to distribute heat evenly and avoid any distortions or warping of the metal. Once the welding is complete, inspect the weld for any imperfections and make any necessary touch-ups or corrections.
Fitting the Front Panel Temporarily
Before finalizing the installation of the front panel, it is advisable to fit it temporarily to ensure proper alignment and fit. Carefully position the front panel in its designated location, aligning it with the surrounding components and openings. Check for any irregularities, gaps, or misalignments that may indicate the need for adjustments. Make any necessary modifications, such as trimming or reshaping the panel, to achieve a precise fit. Once the front panel is satisfactory and consistently aligned, it can be permanently secured using the appropriate fasteners or welding techniques.
Conclusion
Removing the front doors, replacing metal plates, welding edges, mocking up the front of the bus, putting the dashboard back in, creating tabs and brackets, drilling holes, welding the bottom panel, and temporarily fitting the front panel are all crucial steps involved in modifying or renovating a bus. These steps require careful planning, precise measurements, and skilled craftsmanship to ensure a successful outcome. Undertaking these tasks with professionalism and attention to detail will result in a well-executed project that meets the desired goals in terms of both functionality and aesthetics. Remember to prioritize safety throughout the process and consult with professionals when needed to achieve the best results.

