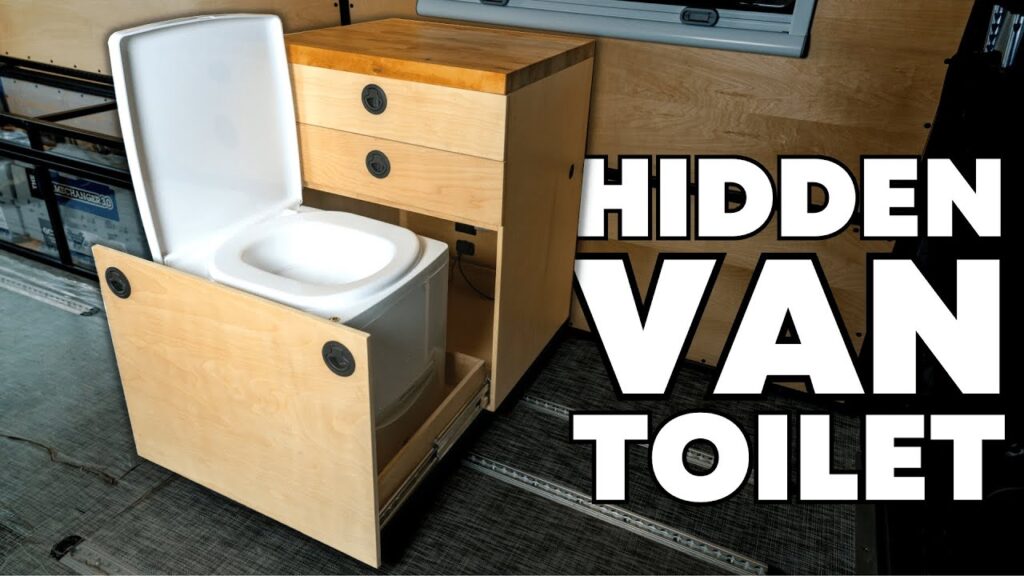
In the video titled “How to Build a Bathroom Cabinet for a DIY Camper Van Conversion” by EXPLORIST life – DIY Campers, you will be guided through the process of constructing a bathroom cabinet for your camper van conversion. The video covers various steps, such as designing the cabinet using SketchUp, creating a cut list for efficient material usage, cutting the plywood with different tools, assembling the cabinet with pocket holes, constructing drawers using birch plywood, adding toe kick bases for support, applying edge banding for a clean finish, sanding and finishing the cabinet, installing drawer slides and face frames, adding cabinet lighting, securing the module to the van, and installing a butcher block countertop. The video also includes helpful demonstrations and tips for a successful build.
Narrated by Nate, the instructional video provides a comprehensive and detailed guide to building a toilet cabinet for a DIY camper van conversion. The step-by-step instructions cover design, construction, mounting, and lighting, ensuring that viewers have a thorough understanding of the process. With clear explanations and visuals, the video aims to empower individuals with the skills and knowledge to create a practical and functional bathroom cabinet for their camper van.
Tools and Materials needed
To successfully build a custom cabinet for your space, you will need several tools and materials. Here is a comprehensive list of everything you will need:
Check out these awesome Van Life Guides!
Circular saw
A circular saw is an essential tool for cutting large pieces of plywood with precision. It allows you to make straight and accurate cuts, ensuring that your cabinet pieces are the perfect size and fit together seamlessly.
Table saw
While a circular saw is great for cutting large sheets of plywood, a table saw is ideal for making precise and clean cuts on smaller pieces of wood. It is especially useful when creating the face frames for your cabinet.
Kreg jig
The Kreg jig is a pocket hole jig that allows you to create strong and secure joints in your cabinet. It works by drilling angled holes into the wood, which are then used to insert screws that hold the pieces together. This tool is essential for ensuring the stability and durability of your cabinet.
Glue and finishing nails
Glue and finishing nails are necessary for securing the various components of your cabinet. The glue provides added strength and stability, while the finishing nails help to hold the pieces in place until the glue dries. These materials are crucial for a sturdy and long-lasting cabinet.
LED strip and black diffuser
Adding LED lighting to your cabinet can enhance both its functionality and aesthetic appeal. The LED strip provides a bright and energy-efficient light source, while the black diffuser helps to evenly distribute the light and create a sleek and modern look.
Brackets and L track hardware
To ensure that your cabinet is securely attached to the surrounding walls or structure, you will need brackets and L track hardware. These components provide stability and support, preventing any shifting or movement of the cabinet once it is installed.
Butcher block countertop
A butcher block countertop adds a beautiful and functional surface to your cabinet. It is durable and can withstand heavy use while providing a classic and timeless look. Choose a butcher block countertop that complements the overall style of your cabinet.
Composting toilet
If you are building a cabinet for a bathroom or outdoor space, a composting toilet may be necessary. These toilets are designed to efficiently break down waste and eliminate the need for a traditional plumbing system. It is important to select a composting toilet that is suitable for the specific requirements of your space.
Designing the cabinet with SketchUp
Using design software like SketchUp can greatly assist in the planning and visualization of your cabinet. It allows you to create a virtual model of the cabinet, accurately determining the dimensions and layout before beginning the construction process. This saves both time and materials, ensuring that you have a clear plan before cutting any wood.

If You Love Van Life, You Will Not Want To Miss These, Click Here to Read More Awesome!
Creating a cut list
Once you have finalized the design of your cabinet in SketchUp, you can generate a cut list. A cut list is a detailed breakdown of all the pieces of wood you will need for your cabinet, including their dimensions and quantities. This list is a valuable resource when purchasing materials and ensures that you have everything you need before starting the construction process.
Efficient material usage
Efficient material usage is crucial when constructing a cabinet. By carefully planning and optimizing the placement of your cuts, you can minimize waste and make the most out of your materials. This not only saves money but also reduces the impact on the environment. It is important to consider the dimensions of your plywood sheets and plan your cuts accordingly, ensuring that you can maximize the use of each sheet.
Cutting the plywood for the cabinet
Before assembling your cabinet, you will need to cut the plywood into the necessary pieces. This will require the use of both a circular saw and a table saw, depending on the size and type of cuts you need to make.
Using a circular saw
To make long, straight cuts on large sheets of plywood, a circular saw is the best tool for the job. Before making any cuts, always ensure that you have properly marked the dimensions on the wood, using a straight edge or a measuring tape. This will help you maintain accuracy and precision while cutting. Additionally, using a guide or a straight edge can assist in keeping your cuts straight and consistent.
Using a table saw
A table saw is ideal for making precise cuts on smaller pieces of wood, such as those used for face frames or drawer components. It allows you to adjust the blade height and angle for different types of cuts, ensuring clean and accurate results. When using a table saw, always remember to use a push stick or another appropriate safety device to keep your fingers safely away from the blade.
Creating pocket holes for assembly
The strength and integrity of your cabinet greatly depend on the joints used for assembly. One popular method is using pocket holes, which are created using a Kreg jig.
Using a Kreg jig
A Kreg jig allows you to create pocket holes of various sizes and angles, depending on your specific needs. These pocket holes serve as secure anchor points for screws, providing strength and stability to the cabinet. When using a Kreg jig, always refer to the manufacturer’s instructions for the correct settings and drill bit size. This will ensure that your pocket holes are properly aligned and the screws fit snugly.
Constructing the drawers
Drawers are an essential component of any cabinet and require careful construction to ensure smooth operation and durability.
Using half-inch birch plywood
For the construction of sturdy and reliable drawers, half-inch birch plywood is an excellent choice of material. Birch plywood is known for its strength and stability, making it perfect for withstanding the weight and frequent use of drawers.
Securing with glue and finishing nails
To ensure that your drawers are solidly constructed, it is important to use both glue and finishing nails. The glue provides added strength to the joints, preventing them from separating over time. Additionally, finishing nails secure the pieces together while the glue dries, ensuring a tight and secure fit. Always remember to use clamps to hold the pieces in place during the gluing and nailing process.
Adding toe kick bases for support
To provide additional support and stability to your cabinet, toe kick bases can be added. These bases are typically made of the same material as the cabinet and are affixed to the module base.
Attaching to the module base
To attach the toe kick bases, align them with the bottom of the cabinet and secure them in place using glue and finishing nails. The toe kick bases should be flush with the front of the cabinet, allowing for easy and comfortable access.
Applying edge banding for a clean finish
Edge banding is a great way to give your cabinet a clean and professional look. It is applied to the visible edges of the cabinet, covering the exposed plywood edges and creating a smooth and finished appearance.
To the visible edges of the cabinet
Using a hot iron, carefully apply the edge banding to the exposed edges of the cabinet. Start at one end and work your way along the edge, ensuring that the banding is firmly adhered and properly aligned. Trim any excess banding with a utility knife and sand the edges for a smooth finish. This step adds a polished touch to your cabinet and helps protect the plywood edges from chipping or splintering.
Sanding and finishing the cabinet
Before applying any final finishes, it is essential to sand the entire cabinet thoroughly. Sanding helps to remove any imperfections and roughness, creating a smooth and even surface for the finish.
Using paste wax
After sanding, applying paste wax adds a protective and attractive sheen to the cabinet. Use a soft cloth or applicator pad to evenly apply the wax, following the manufacturer’s instructions. Allow the wax to dry and then buff the surface with a clean cloth to achieve a smooth and lustrous finish. Paste wax is ideal for cabinets as it provides excellent moisture resistance and can easily be reapplied as needed.
Attaching drawer slides and face frames
To complete the construction of your cabinet, you will need to attach the drawer slides and face frames.
To the module
Drawer slides are installed inside the cabinet, allowing the drawers to smoothly open and close. Follow the manufacturer’s instructions to secure the slides in the correct position. Once the slides are in place, attach the face frames to the front of the cabinet using glue and finishing nails. The face frames provide structural support and add a finished look to the cabinet, hiding the edges of the plywood.
Changing the outro music to rock genre
To add a unique and personal touch to your cabinet project, consider changing the outro music to a rock genre. Whether it’s a high-energy track or a classic rock anthem, selecting a rock song can provide a sense of excitement and satisfaction as you complete your cabinet-building journey. Remember to choose a song that fits your personal taste and energizes your woodworking experience.

