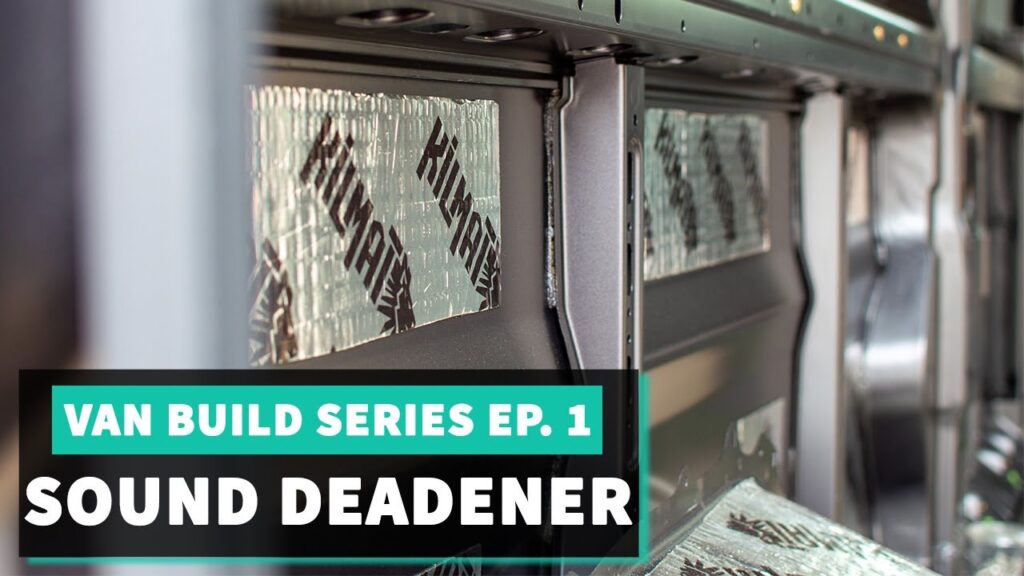
In our latest episode of the Van Build Series, we provide a step-by-step guide on how to install sound deadener in a van. This installation is essential for reducing vibration on the metal, leading to significantly less road noise during your travels. It is a relatively easy and affordable project to undertake, making it a valuable addition to any van build. We recommend using Kilmat 80mL Sound Deadener, but there are other options available as well. Join us as we walk you through the process and share our tips and recommendations for a successful installation.
The primary focus of this project is to cover approximately 25% of the van’s walls, wheel wells, and ceiling with sound deadener to effectively minimize vibrations. We chose Kilmat for its ease of use and the adhesive properties of its beetle tape, which aids in dampening vibrations and preventing reverberations. To prepare the surfaces, a degreaser such as Windex can be used, followed by the application of the sound deadening material using a roller. We also highlight the importance of ensuring proper coverage and demonstrate how to cut and fit the material to various panel sizes. Join us on this van build journey and discover the benefits of installing sound deadener in your own van.

Project Overview
Introduction
Welcome to our comprehensive guide on installing sound deadener in your van! If you’re tired of the constant road noise and the vibration that comes with it, sound deadener can be a great solution to make your travels much quieter and more enjoyable. In this article, we’ll cover everything you need to know about sound deadener installation, from gathering materials and choosing the right product to measuring, cutting, and installing the deadener in different areas of your van. By the end of this guide, you’ll have the knowledge and skills to transform your noisy van into a serene and peaceful space.
Benefits of Sound Deadener Installation
Before we dive into the installation process, let’s briefly discuss the benefits of sound deadener installation. Installing sound deadener in your van can provide several significant advantages. First and foremost, it greatly reduces the noise level inside the van, making your travels much quieter and more relaxing. The deadener material absorbs and dampens vibrations, preventing them from reverberating through the walls and ceiling of your van. This can also result in improved insulation and temperature control in your van, making it more comfortable in both hot and cold weather conditions. Additionally, sound deadener can enhance the audio quality of your music system by reducing external noise interference. Overall, installing sound deadener is a worthwhile investment that can greatly enhance your van life experience.
Preparing for Installation
Gather Materials and Tools
Before you begin the sound deadener installation process, it’s important to gather all the necessary materials and tools. Here’s a list of items you’ll need:
- Sound deadener material: There are various types of sound deadeners available in the market, and we’ll discuss them in detail later in this article. Choose a high-quality sound deadener that suits your needs and van type.
- Degreaser: This is used to clean the van interior before applying the sound deadener.
- Utility knife or scissors: These tools will be used for cutting and trimming the sound deadener to fit different areas of your van.
- Roller or squeegee: A roller or squeegee helps in smoothing out the sound deadener and ensuring proper adhesion.
- Cleaning cloth: You’ll need a cleaning cloth to wipe away any debris or dirt from the van interior.
Make sure you have all these materials and tools readily available before you start the installation process. This will save you time and ensure a smooth workflow.
Clean the Van Interior
Before you can apply the sound deadener, it’s crucial to thoroughly clean the interior of your van. This step is essential to ensure proper adhesion and maximize the effectiveness of the deadener. Start by removing any loose items or debris from the van. Then, use a degreaser and a cleaning cloth to clean the walls, ceiling, and floor of the van. Pay extra attention to areas that are prone to dirt and grease buildup, such as the wheel wells and door frames. Once the van interior is clean and dry, you’re ready to move on to the next steps of the installation process.
Choosing the Right Sound Deadener
Types of Sound Deadener
When it comes to sound deadeners, there are several different types to choose from. The most common types include:
- Butyl rubber sheets: These are versatile sound deadeners that offer good overall performance. They’re easy to install and provide effective noise reduction.
- Asphalt-based sheets: These sound deadeners are more affordable but may not provide the same level of performance as butyl rubber sheets. They’re still a popular choice for budget-conscious van owners.
- Mass loaded vinyl (MLV): MLV is a dense and flexible material that offers excellent soundproofing properties. It’s often used in high-end soundproofing applications.
- Foam-based sheets: Foam-based sound deadeners are lightweight and easy to install. They provide effective sound insulation and can also help reduce vibrations.
Considerations When Choosing Sound Deadener
When selecting a sound deadener for your van, there are a few important factors to consider:
- Van type and size: The size and shape of your van will influence the amount of sound deadener material you’ll need.
- Budget: Sound deadeners come in a range of prices, so it’s important to consider your budget and choose a product that offers good value for money.
- Installation difficulty: Some sound deadeners are easier to install than others. Consider your DIY skills and choose a product that you’re comfortable working with.
- Performance requirements: Different sound deadeners have different noise reduction capabilities. Determine how much noise reduction you need and choose a product accordingly.
Take these considerations into account when choosing the right sound deadener for your van. It’s also a good idea to read product reviews and seek recommendations from other van owners to ensure you make an informed decision.
Measuring and Cutting the Sound Deadener
Measure the Walls, Ceiling, and Wheel Wells
Before you can start cutting the sound deadener, you need to measure the surfaces you’ll be covering. Use a measuring tape to measure the length and width of the walls, ceiling, and wheel wells of your van. It’s recommended to measure each area separately to ensure accuracy. Write down the measurements for each area so that you have them handy when it’s time to cut the sound deadener.
Cutting the Sound Deadener to Size
Once you have the measurements, it’s time to cut the sound deadener to the appropriate size. Lay the sound deadener material on a clean, flat surface and use a utility knife or scissors to cut it according to your measurements. It’s best to cut the material slightly larger than the measured size to allow for adjustments and ensure a snug fit. Take your time and make clean, straight cuts to ensure the best results. Once the sound deadener is cut to size, you’re ready to start the installation process.

Installing Sound Deadener on the Walls
Apply Degreaser to the Walls
Before applying the sound deadener to the walls, it’s important to clean them again with a degreaser. This step will remove any remaining dirt or grease that might hinder the adhesion of the deadener. Apply the degreaser to a clean cloth and wipe the walls thoroughly. Make sure the walls are dry before moving on to the next step.
Peel Off the Backing and Stick the Sound Deadener
Now it’s time to peel off the backing of the sound deadener and stick it to the walls of your van. Start by peeling off a small section of the backing and slowly press the sticky side of the sound deadener onto the wall, working your way from the top to the bottom. Use a roller or squeegee to smooth out any air bubbles or wrinkles and ensure proper adhesion. Continue this process until all the walls are covered with the sound deadener. Pay attention to corners and edges, making sure the deadener is securely adhered to the entire surface. Once all the walls are covered, you can move on to installing the sound deadener on the ceiling.
Installing Sound Deadener on the Ceiling
Clean the Ceiling Surface
Similar to the walls, it’s important to clean the ceiling surface before applying the sound deadener. Use a degreaser and a clean cloth to wipe away any dirt or grease. Make sure the ceiling is completely dry before proceeding.
Stick the Sound Deadener onto the Ceiling
Peel off the backing of the sound deadener and carefully stick it onto the ceiling of your van. Start from one corner and press the sticky side of the deadener onto the ceiling, working your way across. Use a roller or squeegee to smooth out any air bubbles or creases, ensuring proper adhesion. Take your time and ensure the deadener is securely applied to the entire ceiling surface. Once the ceiling is covered, it’s time to move on to the wheel wells.

Installing Sound Deadener on the Wheel Wells
Prepare the Wheel Wells
Before applying the sound deadener to the wheel wells, it’s important to prepare the surface. Clean the wheel wells using a degreaser and a clean cloth, making sure to remove any dirt, debris, or grease. Ensure that the wheel wells are completely dry before proceeding to the next step.
Apply the Sound Deadener onto the Wheel Wells
Peel off the backing of the sound deadener and carefully apply it to the wheel wells of your van. Press the sticky side of the deadener onto the wheel well surface, ensuring proper adhesion. Use a roller or squeegee to smooth out any air bubbles and creases. Take your time and make sure the deadener is securely applied to the entire wheel well surface. Repeat this process for each wheel well, ensuring consistent application throughout.
Fitting Sound Deadener around Obstacles
Cutting Sound Deadener for Vents or Windows
If your van has vents or windows that need to be covered with sound deadener, you’ll need to cut the material to fit around these obstacles. Measure the size of the vent or window and cut a piece of sound deadener slightly larger than the measured size. Carefully position the sound deadener around the obstacle, ensuring a snug fit. Use a roller or squeegee to smooth out any air bubbles or creases and ensure proper adhesion. Take your time and make clean, precise cuts to achieve the best results.
Securing Sound Deadener Around Obstacles
To ensure the sound deadener stays securely in place around obstacles such as vents or windows, use a strong adhesive tape or caulk to seal the edges. Apply the tape or caulk along the edges of the sound deadener, pressing it firmly to create a seal. This will prevent any unwanted air leakage or vibrations around the obstacles, further enhancing the effectiveness of the sound deadener.

Finishing Touches
Smooth Out the Sound Deadener
Once you have installed the sound deadener on all the surfaces of your van, take a few moments to go over the entire area and smooth out any remaining air bubbles or creases. Use a roller or squeegee to gently press down on the sound deadener, ensuring it is uniformly adhered to the surfaces. This step will ensure a professional-looking finish and optimal soundproofing performance.
Check for Proper Adhesion
After smoothing out the sound deadener, carefully examine each area to ensure proper adhesion. Pay close attention to corners, edges, and areas around obstacles to ensure the deadener is securely attached. Gently press down on any areas that might need reinforcement. If you notice any loose or unsecured sections, use additional adhesive tape or caulk to secure them in place. Proper adhesion is essential for the sound deadener to effectively reduce noise and vibrations in your van.
Conclusion
Final Thoughts
Installing sound deadener in your van is a fantastic way to create a quieter and more comfortable traveling experience. By following the steps outlined in this article, you can successfully install sound deadener on the walls, ceiling, and wheel wells of your van. Remember to gather all the necessary materials and tools, clean the van interior thoroughly, and carefully measure and cut the sound deadener to the appropriate size. Take your time during the installation process and ensure proper adhesion of the deadener. With a quieter van, you can now enjoy peaceful and relaxing journeys on the road.
Enjoy a Quieter Van
Once the sound deadener is properly installed, you can enjoy the many benefits it provides. Say goodbye to the constant noise and vibrations that used to plague your van. With the sound deadener in place, you can experience a significant reduction in road noise, improved insulation, and enhanced audio quality. Whether you’re embarking on a long-distance trip or simply commuting to work, your van will be a much quieter and more enjoyable space. Sit back, relax, and enjoy the tranquility of your newly soundproofed van.

