

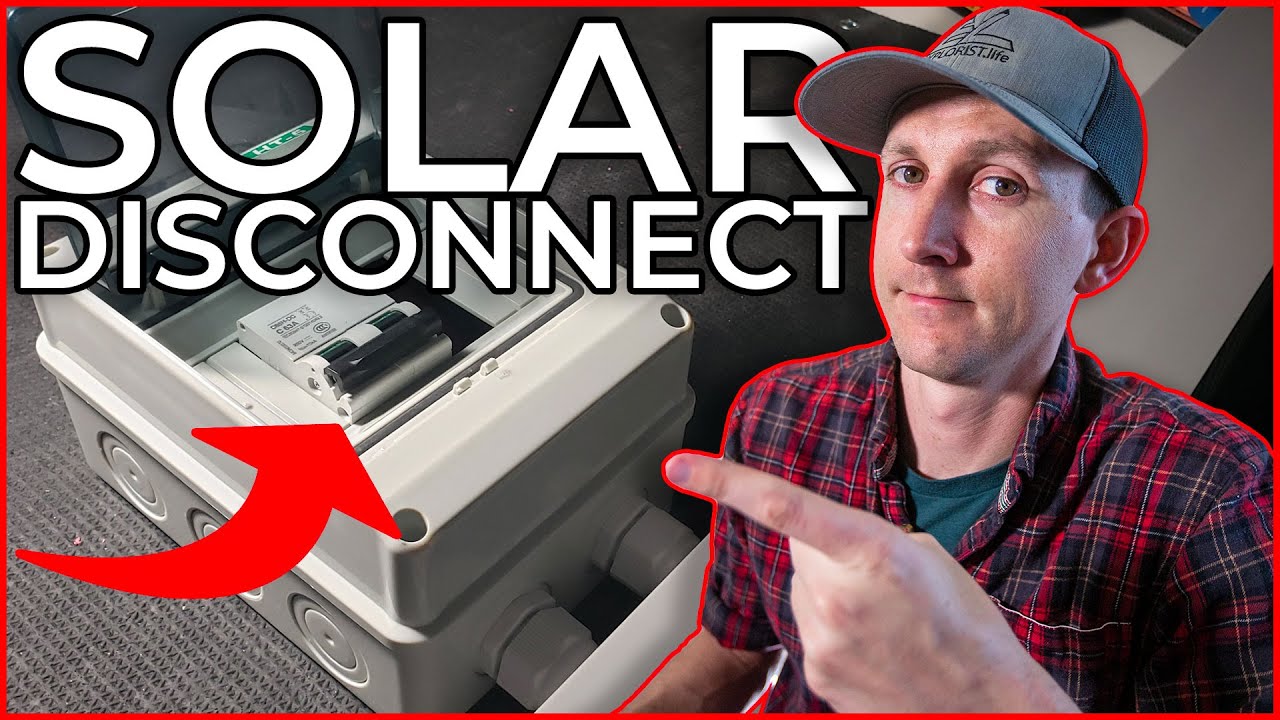
In this blog post, I am going to teach you how to wire a solar array disconnect for a DIY camper electrical system. A solar disconnect is both convenient and a code requirement, so it’s important to know how to install it properly. The video will provide information on which disconnect to use, how to size it, and the step-by-step process of wiring it. Additionally, the article will mention various additional resources for planning and installing your own DIY camper. So, if you’re ready to learn the basics of wiring a solar disconnect, keep reading!
Hey everybody, it’s st from Explorers.life. I teach people how to spell DIY campers, and in this video, I am going to teach you how to wire a solar array disconnect, why you need one, and which one to use. This video is part of a series where I teach you basic electrical skills and concepts for your camper. The solar disconnect that I will be showing you how to wire can be found in my wiring diagrams on Explorers.life solar wiring diagrams. So, let’s get started and I’ll walk you through the process step-by-step. But before we begin, remember to always double-check that your solar panels are disconnected from the wires to avoid any shocks or accidents.

Check out these awesome Van Life Guides!
Choosing the Right Solar Disconnect
When it comes to solar power systems, choosing the right disconnect is crucial for the safe and efficient operation of your system. A disconnect is an electrical device that allows you to turn off the power supply to your solar panels, allowing for maintenance or in the event of an emergency. There are several types of disconnects available, and each has its own set of features and benefits.
Types of Disconnects
There are three main types of disconnects commonly used in solar power systems: fused disconnects, non-fused disconnects, and AC disconnects.
Fused disconnects are equipped with fuses that protect the system against overcurrent conditions. These disconnects provide an added layer of protection and are ideal for systems in areas with high fault currents.
Non-fused disconnects, on the other hand, do not have fuses but are still capable of breaking the connection to the solar panels. These disconnects are typically smaller and more cost-effective but may not provide the same level of protection as fused disconnects.
AC disconnects are specifically designed for use in grid-tied solar power systems. They allow you to disconnect the AC power generated by your solar panels from the utility grid. AC disconnects are essential for maintenance or repairs and also serve as a safety feature by isolating the system from the grid during emergencies.
When choosing the right disconnect for your solar system, consider factors such as fault current levels, system voltage, and your specific requirements. It is advisable to consult a professional or refer to the manufacturer’s recommendations to ensure the disconnect you choose is suitable for your system.
Sizing the Disconnect
To ensure the disconnect can handle the electrical current generated by your solar panels, it is crucial to properly size the disconnect. The sizing of the disconnect is determined by the system’s maximum current and voltage ratings.
To determine the maximum current rating, you need to consider the current output of your solar panels. This information can typically be found in the product specifications provided by the manufacturer. Ensure that the disconnect’s current rating is equal to or higher than the maximum current output of your panels to avoid any potential issues or malfunctions.
In addition to the current rating, it is important to consider the voltage rating when sizing the disconnect. Solar panels generate direct current (DC) voltage, which needs to be converted to alternating current (AC) for use in most electrical systems. The voltage rating of the disconnect should match the system voltage to ensure compatibility and safe operation.
Planning the Wiring
Once you have chosen the right disconnect for your solar system, it’s time to plan the wiring. Proper planning and installation of the wiring are crucial for the overall performance and safety of your solar power system.
Determining the Location
The first step in planning the wiring is determining the location of the disconnect. The disconnect should be easily accessible and located as close as possible to the solar panels. It should also be positioned in an area where it will be protected from the elements and potential damage.
Take into account any local regulations or building codes that may dictate the specific location requirements for the disconnect. Consult with a licensed electrician or refer to the manufacturer’s guidelines to ensure compliance with these regulations.
Calculating Cable Lengths
After determining the location of the disconnect, the next step is to calculate the cable lengths required for the wiring. Measure the distance from the solar panels to the disconnect location, taking into account any obstacles or bends in the conduit path.
It is essential to choose the correct cable size based on the length of the cable run and the current rating of the system. Undersized cables can lead to voltage drop, reduced efficiency, and potential safety hazards. Consult a professional or refer to industry guidelines to determine the appropriate cable size for your specific system.
Selecting Wiring Components
Once you have calculated the cable lengths, you need to select the necessary wiring components for the installation. This includes conduit, connectors, junction boxes, and any other necessary accessories.
When selecting these components, ensure they are rated for outdoor use and can withstand the environmental conditions in your area. Additionally, choose components that are compatible with the disconnect and other equipment in your solar system.
Gathering the Tools and Materials
Before proceeding with the wiring process, gather all the necessary tools and materials. Having everything on hand will make the installation smoother and more efficient.
List of Tools
Here is a list of essential tools you may need for the wiring process:
- Screwdrivers (flathead and Phillips)
- Wire cutters
- Wire strippers
- Pliers
- Taper measure
- Conduit bender (if applicable)
- Drill and bits
- Level
- Safety glasses
- Gloves
- Ladder or scaffolding (if needed)
Ensure that all tools are in good working condition and suitable for the specific tasks you will be performing during the installation.
List of Materials
In addition to tools, you will also need various materials for the wiring process. Here is a general list of materials you may require:
- Conduit
- Connectors and fittings
- Junction boxes
- Cable ties
- Wiring labels or markers
- Split bolts or other connectors for splicing wires
- Electrical tape
- Mounting brackets or hardware for the disconnect
- Grounding equipment (if required)
Ensure that all materials are designed for outdoor use and meet the necessary safety and industry standards. Consult with a professional or refer to the manufacturer’s recommendations to ensure you have all the required materials for a successful installation.
If You Love Van Life, You Will Not Want To Miss These, Click Here to Read More Awesome!
Step-by-Step Wiring Process
With the planning, tools, and materials in place, you can now proceed with the step-by-step wiring process. Follow the instructions below to ensure a safe and effective installation.
Installing the Dual Pole Breaker
For grid-tied solar power systems, the first step is to install a dual pole breaker in your electrical panel. This breaker connects the solar system to your main electrical supply.
Turn off the main power supply to the electrical panel before proceeding with the installation. Install the dual pole breaker according to the manufacturer’s instructions, following all necessary safety precautions.
Mounting the Disconnect
Once the dual pole breaker is installed, you can mount the disconnect near the solar panels. Ensure that the disconnect is securely attached to a suitable surface using the provided mounting brackets or hardware.
Wiring the Disconnect
Next, you need to wire the disconnect according to the manufacturer’s instructions and the specific requirements of your system. This typically involves connecting the positive and negative DC cables from the solar panels to the disconnect.
Take extreme care during the wiring process and ensure all connections are secure and properly insulated. Improper wiring can lead to electrical hazards or system malfunctions.
Connecting the Array to the Disconnect
Once the disconnect is wired, you can connect the solar array to the disconnect. Ensure that all connections are tight and free of any debris or obstructions. Double-check the polarity to ensure correct alignment of positive and negative connections.
Ensuring Safety
Safety should always be a top priority when working with solar power systems. Follow these guidelines to ensure your safety during the wiring process and beyond.
Working with Proper PPE
Personal Protective Equipment (PPE) is essential when working with electricity. Wear safety glasses, gloves, and any other necessary protective gear to protect yourself from potential electrical hazards.
Understanding Electrical Safety
Have a thorough understanding of electrical safety practices and procedures before working on your solar power system. Ensure you are familiar with the disconnect’s operation, safety protocols, and emergency shut-off procedures.
Do not attempt any tasks that are beyond your knowledge or experience level. If you are unsure about any aspect of the wiring process, consult with a licensed electrician or professional solar installer.
Testing the System
After completing the wiring process, it is crucial to test the system to ensure everything is functioning correctly. Here are the two main tests you should perform:
Checking for Continuity
Using a multi-meter or a continuity tester, check for continuity in the wiring connections. This ensures that there are no open or broken circuits that could affect the performance of the solar power system. If any issues are detected, troubleshoot and resolve them before proceeding.
Measuring Voltage
Using a voltmeter, measure the voltage produced by the solar panels. Compare the reading to the expected voltage specified by the manufacturer. Ensure that the voltage output is within the acceptable range. If the reading is significantly lower than expected, there may be an issue with the wiring or connections that needs to be addressed.
Troubleshooting Common Issues
Despite careful planning and installation, issues may still arise with your solar power system. Here are two common issues and potential troubleshooting steps:
No Power Output from the Array
If there is no power output from the solar array, check the DC wiring connections and ensure they are properly connected and secure. Verify that the disconnect is in the “on” position and that the circuit breaker in the electrical panel is functioning correctly. If the issue persists, consult with a professional to further diagnose and resolve the problem.
Disconnect Not Operating Properly
If the disconnect is not operating as intended, check for loose or faulty connections. Ensure that the disconnect is properly wired and that all connections are tight. If the disconnect continues to malfunction, consult with a professional or refer to the manufacturer’s troubleshooting guide for further assistance.
Additional Resources
To further enhance your knowledge and understanding of solar power systems and the wiring process, consider exploring online guides and tutorials. These resources can provide valuable insights, tips, and troubleshooting techniques.
Online Guides and Tutorials
- The Solar Energy Industries Association (SEIA) offers a range of online resources, including guides and tutorials on solar power system installation and maintenance.
- Solar Power World provides comprehensive articles and videos covering various aspects of solar power system installation and wiring.
Recommended Equipment and Suppliers
When it comes to selecting proper equipment and suppliers for your solar power system, it is often beneficial to seek recommendations from professionals or trusted sources. Consider consulting with a licensed electrician or professional solar installer to ensure you choose the best equipment and find reputable suppliers.
Conclusion
Choosing the right solar disconnect and properly wiring your solar power system are key steps in ensuring its safe and efficient operation. By considering factors such as disconnect types, sizing, location planning, and selecting appropriate tools and materials, you can achieve a successful installation. Be diligent in following safety guidelines, testing the system, and troubleshooting any issues that may arise. With the proper planning, knowledge, and resources, you can confidently install and maintain your solar power system for years to come.